Leaving a rental can quickly turn into an obstacle course. Just when you think you’re done, you spot them—those faint outlines where pictures once hung, a few nail holes, and maybe even a scuffed corner or two.
It’s easy to miss these signs of everyday living until the walls are bare and every mark suddenly seems to glare back at you. But these small imperfections can cost you a hefty portion of your deposit.
To help you end your tenancy on the best possible note, this guide will show you how to spot, repair, and prevent wall damage, so let’s get straight to it.
Common Signs of Wall Damage
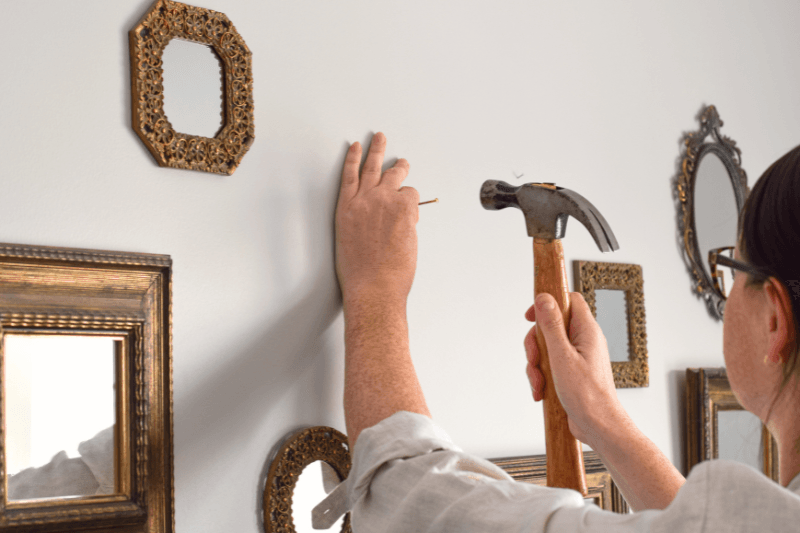
Walls tell stories. Whether you’ve hung a single frame or created a full gallery wall, they remember every nail, screw, and adhesive strip you’ve used.
Even the smallest holes stand out once the furniture is gone and the light hits the surface at the wrong angle. What once seemed like an invisible scuff will suddenly feel like a crater.
Adhesive hooks can be just as problematic. They promise a clean peel, but one impatient tug can take half the paint along with it.
Then there’s the furniture. Over time, chairs bump, desks scrape, and bookcases leave faint marks that blend into the background—until the day you move out. By the time you notice them, they’ll have become part of the décor you never meant to add.
None of this is unusual, but it all counts as damage during an end-of-tenancy inspection, especially if you’re counting on a full deposit refund.
What You’ll Need to Fix It All
You don’t need to transform your living space into a full-blown workshop. To leave the place looking professionally tended, all you need are a few good-quality materials and a steady hand.
Your trusty supplies should include:
- Ready-mixed or powdered wall filler;
- A small putty knife or filling blade;
- Medium- and fine-grit sandpaper;
- Primer and matching wall paint;
- A small roller and paintbrush;
- Masking tape and a clean cloth.
To ensure a perfect colour match, take a small flake from a hidden corner to your local DIY shop, and they’ll help you find the right shade. When in doubt, go for a slightly lighter tone. It’ll blend better than a darker one.
And don’t skip the primer. It’s not just a base coat. It also hides filler marks, giving your paint a smooth, even finish.
How to Repair Marks and Holes Like a Pro
With your supplies handy, it’s now time to roll up your sleeves and get right to it.
Your first step is to clean the surface so the filler can stick to it properly. Start by wiping away any dust, grease, or residue with a damp cloth. Then, let it dry completely before you proceed.
Next, grab your putty knife and press the filler firmly into each gap. For a smooth finish, remove any excess as you go, and make sure it’s level with the surrounding wall.
For larger holes, allow the first layer to dry before adding a second one. Rushing will only create bumps that show through the paint.
Once the filler is fully dry, sand the area down with medium-grit paper, then switch to fine-grit paper for a silky-smooth texture.
Before you reach for the paint, wipe away the dust with a clean cloth, then apply a coat of primer to seal the freshly repaired spot.
After it dries down, apply thin, even layers of paint, slightly overlapping the patched-up area to blend it in. For a seamless finish, try your best to feather the edges as you go, and remember, two light coats are better than a single thick one.
Most importantly, take your time and step back now and then to inspect your handiwork. That way, you’ll get impeccable, streak-free results.
When to Actually Call in an Expert
Sometimes, even the best DIYer meets their match. Deep dents, peeling paint, or poorly patched walls can quickly turn into time-consuming projects. If your moving checklist is already overflowing, a certified handyman can help preserve your sanity.
In addition to repairing nail holes, cracks, and wall damage, they’ll also make sure the paint blends perfectly for a neat and even finish.
Better still, if you book a move-out cleaning service through a reputable company, you can often bundle wall repairs with other tasks to save both time and money.
Depending on the state of your home, you can combine deep cleaning with grout restoration or minor fixture replacements. That way, you’ll ensure that the property is in pristine condition from top to bottom before the final inspection.
Think of it as outsourcing your peace of mind. A dependable repair service doesn’t just protect your deposit. It also leaves a lasting impression of reliability, which is especially helpful if you need a reference from your current landlord or letting agent.
How to Prevent Future Damage
After all the patching and painting is done, you’ll probably swear to avoid this hassle moving forward.
If you wish to decorate your next home, try picture-hanging strips or removable adhesive hooks instead of screws. They’re ideal for light items, such as photo frames or small mirrors. Just remember to peel them off carefully from the edge, not the centre, to avoid chipping the paint.
For heavier décor, consider tension rods or freestanding display shelves. They’re neat, easily removable, and will keep your walls intact.
Of course, you can’t forget about the furniture. To prevent future scuffs and scrapes, simply place felt pads under your chairs, desks, and bookcases.
With these simple adjustments, your next move-out experience will be far less stressful.
Conclusion
Landlords tend to notice what tenants no longer see, and their standards for ‘fair wear and tear’ don’t always match yours. But those seemingly harmless holes can cost you a large portion of your deposit.
So, take the time to fix them, or hire someone who can, to ensure your departure is smooth and stress-free.
There’s also something satisfying about leaving a place in good order. It’s a quiet nod to the years spent there and the next person who’ll make it their home.